By : Sita Gulwadi
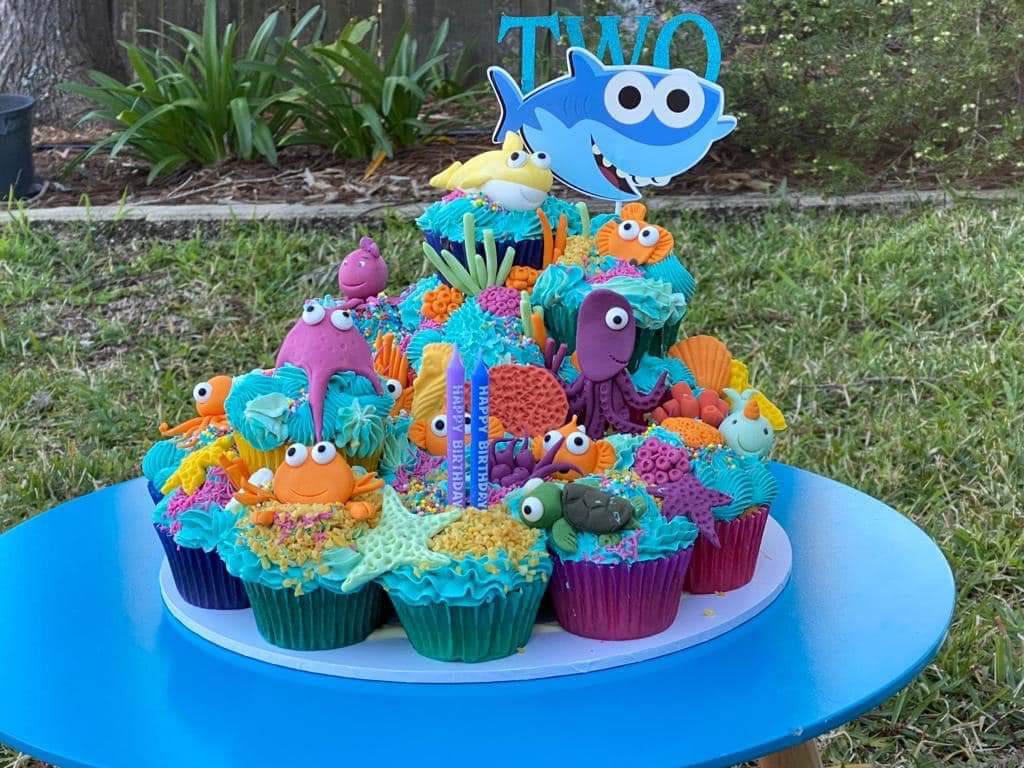
Our guest foodie this week is Mrs Sita Gulwadi from Sydney (Australia) who came up with a stunningly beautiful homemade creation for her son Manan’s 2nd birthday, inspired by his favourite cartoon characters.
Read the story of how she put together this masterpiece painstakingly over several days combining art and baking techniques in a way that will inspire you!
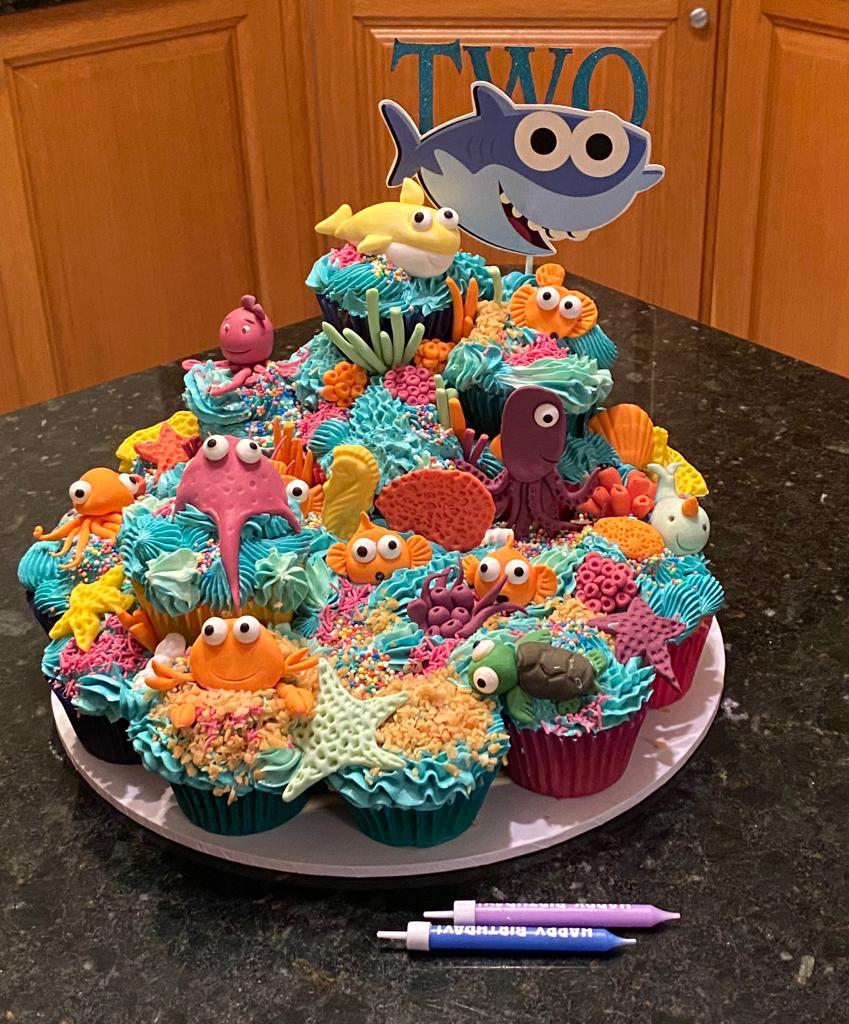
Sita calls it The Pull Apart Reef cake!
How did she get the idea?
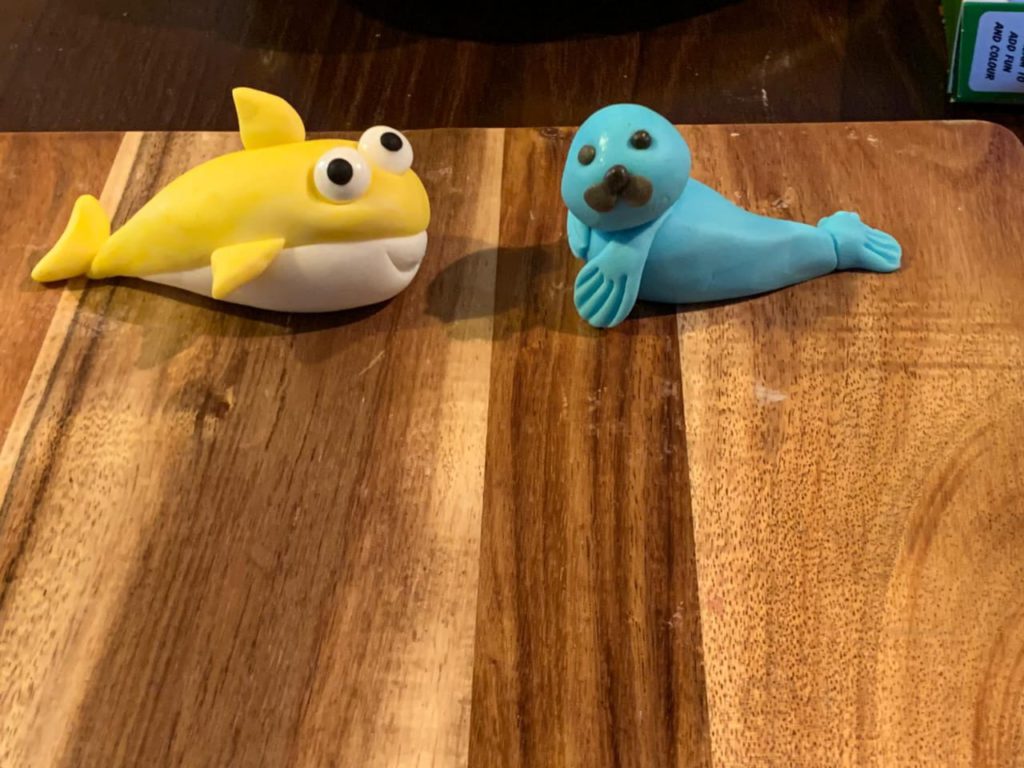
Sita – “Manan is really into baby shark .He would wake up screaming “shark” every morning even before he learnt to say “mummy” so I knew this is what I was to bake him for his birthday. But as months went by his vocab got a whole lot better and he demanded a clapping seal, a walking crab, a jellyfish and an octopus each time we asked him what he’d like his cake to be like. His wish list just kept increasing thanks to all his aquarium visits”
Did she plan the whole thing before hand or was it a series of improvisations?
Sita – “My only plan really was to get all my fondant work sorted as it keeps well for months if stored right. In the process of getting things ready beforehand for his birthday, I realised just a day in advance that I had no baking tins. We had just moved houses and my boxes with my bakeware were still sitting somewhere in our garage.
Originally I had intended to make a traditional round cake with 3 layers of sponge, but then just made some cupcakes (chocolate and zesty orange) using my mum in laws handy cupcake trays . Totally unintentional and as stressful as it was to be this unprepared, think it worked really well in the end. It was meant to be
What were the tricky parts that one needs to watch out for while making this cake? Any dos and don’ts for making it safe for kids?
Sita – No tricky parts to this one. Any basic cake recipe can be used along with any icing recipe. I used a Russian icing recipe that seemed really simple and quick and not too sweet. Think I will stick with that recipe now on.
I did not want to use any tooth picks or cake studs to hold the reef shape together Just so it was more kid friendly and to avoid choking hazards, so used melted chocolate to help the cupcakes sit stable one on top of the other.
For the icing I created an ombré effect by dividing the icing into 3 parts and adding a little more of the aqua blue icing gel each time. I think that’s what lifted the look of the cake by a notch higher.
The good part about icing this cake was that you don’t have to be a pro at piping. I used the same star nozzle to pipe out different styles creating ruffles, swirls, shells, rosettes, stars. You do get star nozzles with an open tip or a closed one. I chose to work with an open tip, but use whatever you have, the end result will be the same if you just use different techniques and pressure to pipe out.
Another tip is to decide what part of your cake is going to be the front of your cake. I had my reef a bit off centre. To know that before you start helps with the piping and the placing of the fondant decorations. I baked 2 dozens of orange cupcakes. My first layer had 18 cupcakes, the second tier 5 at the back end and finally 1 on top. But one could build the reef as high or wide as they wished.
How much time did the whole project take?
Sita – I baked the cupcakes the afternoon before Manan’s birthday. Took me a couple of hours so perfect job to get done at nap time.
Made the icing after he went to bed that night and piped and assembled the fondant pieces on the night itself. This icing recipe is my new favourite as its really simple and quick yet super delicious and holds shape really well too. It took me about 1/2 hr to make the icing and another 1/2 hr to pipe and top the cake with the pieces.
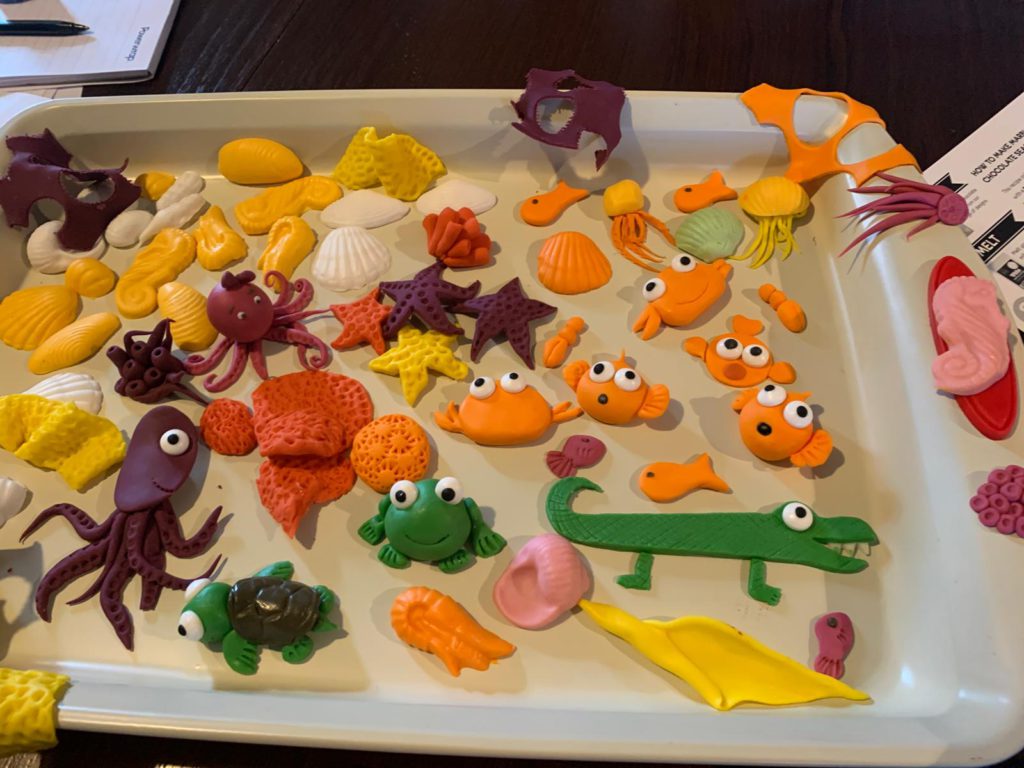
I made the fondant over many days using whatever spare time I had in between his naps. Overall I probably spent 5-6 hours on the fondant as my skills have become a bit rusty. I did realise that I had made a lot more decorations than I actually needed, but hey it was so much fun.
And now for the Recipe and the Process:
Fondant recipe
2 1/2 tablespoons water
3 teaspoons gelatine powder
1 tablespoon liquid glucose
420g (2 2/3 cups) pure icing sugar
80g (1/2 cups) pure icing sugar, extra
Method
- Place water in a heatproof bowl. Add gelatine powder. Place bowl in a larger heatproof bowl filled with boiling water. Set aside, stirring often, for 5 minutes or until gelatine dissolves. Stir in liquid glucose until dissolved. Set aside until just warm.
- Place 420g pure icing sugar in a bowl. Make a well. Add the gelatine mixture. Stir until a pliable icing forms. Turn onto a work surface lightly dusted with pure icing sugar. Knead until smooth, adding 80g (1/2 cup) pure icing sugar to prevent sticking. Place in a sealable plastic bag and rest for 1 hour.
Note: You can also get readymade fondant at a baking store or online
Cupcakes recipe
130 g (1 cup / 4.6oz) plain (all purp) flour
35 g (1/4 cup / 1.2oz) corn flour (cornstarch)
1 teaspoon baking powder
1/4 teaspoon salt
115 g (1/2 cup / 1 stick) unsalted butter, melted
3/4 cup (150g / 5.3oz) caster (superfine) sugar
1/4 cup whole milk, room temp
2 large eggs, room temp
2 oranges chopped into pieces and deseeded
2 tbsp of orange juice (optional)
1 teaspoon vanilla extract
Method:
- Preheat the oven to 180C / 350F / 160C fan forced. Line a 12 hole muffin tin with cupcake liners.
- Place the flour, corn flour, baking powder and salt in a bowl and whisk to mix well.
- In a separate bowl, mix together the melted butter and sugar just to combine.
- Add the milk, eggs, orange segments, juice and vanilla and whisk really well to combine.
- Add the dry ingredients to the wet ingredients and stir through gently with a spatula until just combined.
- Fill the cupcake cases to about 2/3 full. Bake for around 20 minutes or until toothpick inserted comes out clean.
Icing recipe
For the White chocolate buttercream
500 g unsalted butter (room temperature)
400ml condensed milk ( slightly cold- maybe get it out of the 15-20 mins prior to use)
300-400 g of any good quality white Chocolate (melted)
Method:
- Whip the butter using a stand mixer or a hand held mixer for a good 5-7 mins until the butter is pale and doubled in size.
- Slowly add the condensed milk bit by bit.
- Then add the melted white chocolate and beat until it’s all combined. One could add food colouring at this stage
You May Also Like:


